7 minutes
Adding an AMB FME-W Automatic Tool-Changing Spindle to my CNC
Once I decided that I was going to upgrade my CNC, the first upgrade that I commited to was replacing the DeWalt DWP611 that came with my Shapeoko. The DeWalt is really just a small trim router. It’s well made but it has a very limited RPM range–16,000 to 26,000 RPM. A lot of milling activities need lower RPMs than that.
While researching possible options, I kind of fell in love with the idea of a tool-changing spindle. Expensive professional CNC machines generally have the ability to swap tools on the fly, so you can use a big square endmill for clearing out material rapidly, then shift to a ballnose for curves, progressively smaller bits for detail work, drill bits for drilling repeated holes, or whatever makes sense for the project at hand.
After researching automatic tool changing (ATC) spindles, it looked like I had 3 options:
- Buy a pricy, not-very-well-documented Chinese water-cooled ATC spindle. Most of the ones that I saw wanted 3 or 4 different air lines at different pressures to control the tool changer, plus a few different electric connections.
- Buy one of a couple different add-on tool changers on the market that bolt onto an existing spindle. There have been a few that have come and went over time; none have ever seem to have developed much of a following, and there’s some indication that they don’t actually work very well. It’s tough to get extreme mechanical accuracy this way.
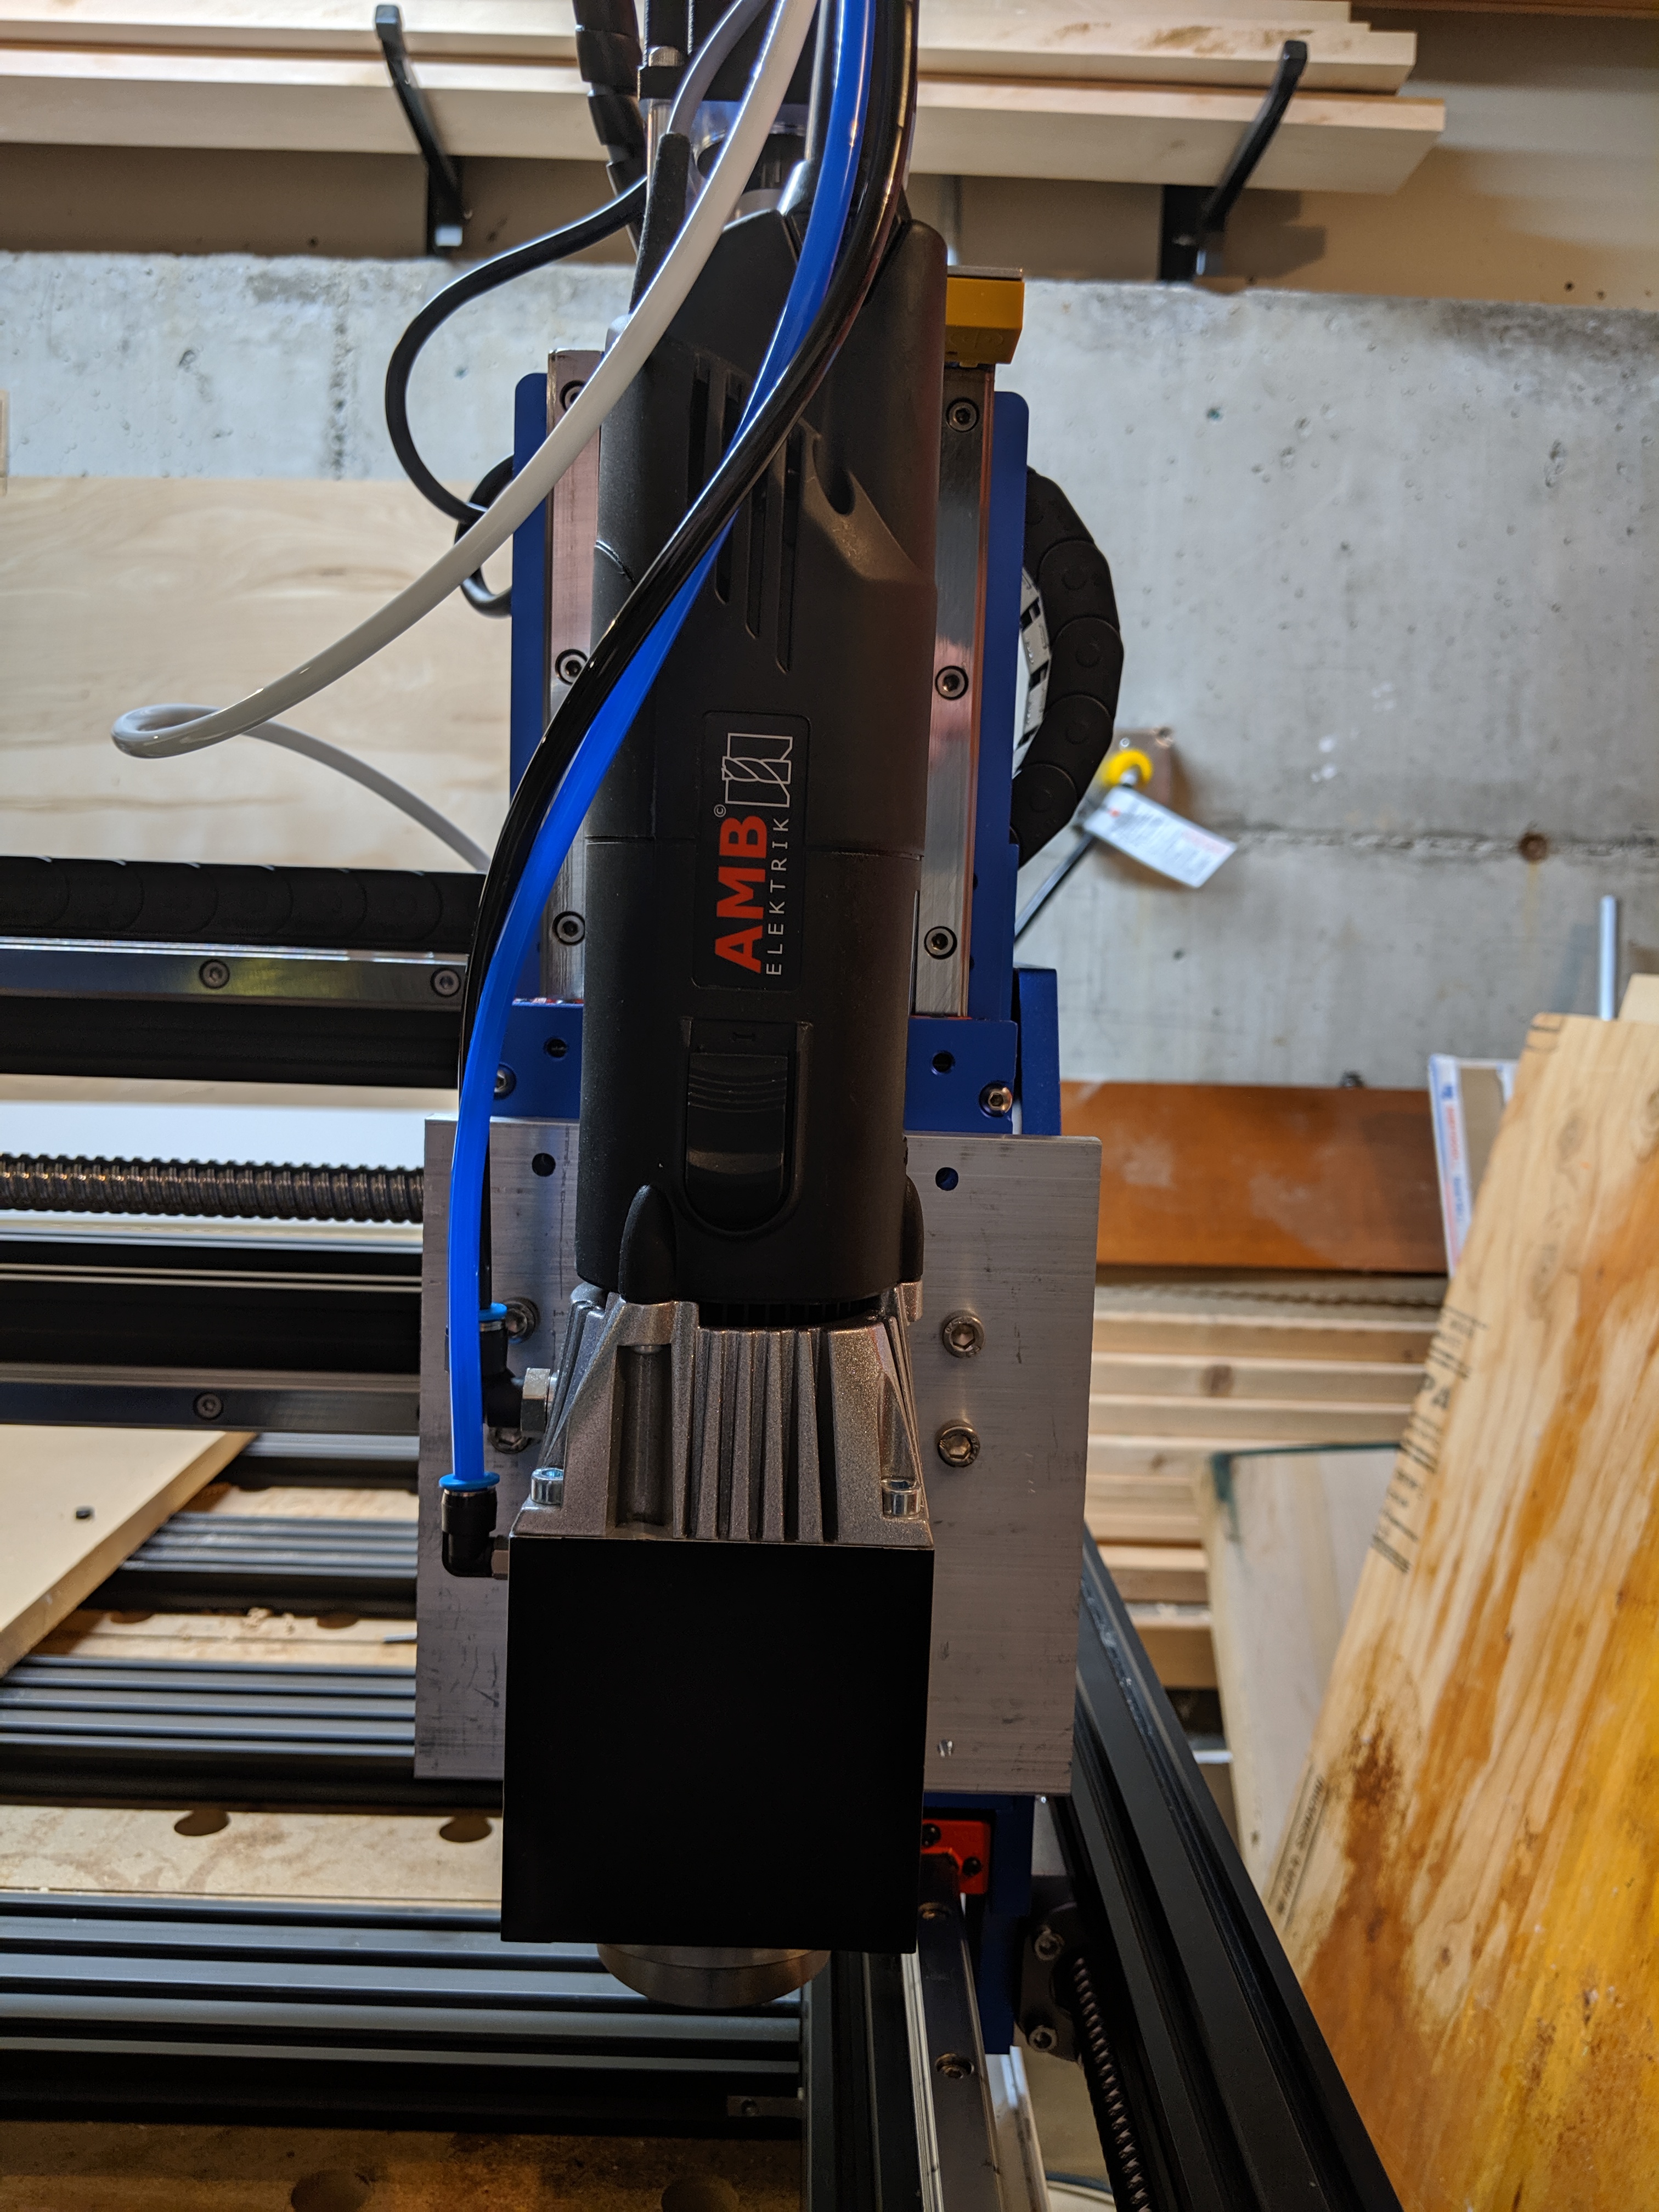
- Buy the new (only shipping for a couple months) AMB FME-W spindle from Germany. AMB bought out Kress, who has made CNC spindles for years, and produced a model with a built-in tool changer and electronic speed control. For less money than the Chinese spindles, and probably better results than the add-on tool changers. Unlike earlier Kress spindles, it uses ER-16 collets, which means that it’ll take tools up to 3/8" or 10mm.
I decided to get the AMB spindle. And then all of the fun began. No one in the US sold them back in December. And none of the European dealers were willing to sell into the US. Eventually, I got in touch with Larry at Midwest Circuit Technology. He sells other AMB models, and AMB eventually coughed up a price that I was willing to pay. Three or four weeks later, I had it in my grubby little hands, along with a few extra tool holders.
During the wait, I got started on the electronics needed to drive it. I was planning on connecting this to my Shapeoko initially and then upgrading the Shapeoko to something larger after a few months. The CNC controller that Shapeokos use has the ability to control variable-speed router spindles, but it doesn’t have any notion of automatic tool changers. In fact, it doesn’t really know much about anything beyond the bare minimum needed to do its job. The CPU underneath everything is an ATmega328p (basically an Arduino Uno, roughly similar to a Commodore 64), and it’s completely full. Grbl (the software used) uses pretty much every bit of RAM, every wire of I/O, and every bit of storage on the chip. If I wanted to add support for tool changers, then I’d need to do it outside of Grbl.
Here’s what I had to work with:
- The spindle needs 220V AC power to spin, 24VDC power for its electronics, and a 0-10VDC signal to control its speed.
- Tool ejection is controlled via 2 6mm pneumatic hoses at around 100 PSI. One hose unlocks the tool and the other one ejects it. To change tools, move to a tool storage slot, unlock the tool, hit eject a couple times, then lift up and off of the old tool. Move down onto the new tool, and re-lock onto it.
- According to the original spindle datasheet, the spindle interpreted 0V on its speed control line as a request to spin at 5000 RPM. That meant that there was no way to turn it off via the 0-10V line, which meant that I needed to put a relay of some sort onto the 220V AC line to turn it off. It turns out that the original datasheet isn’t correct–at 0V the spindle doesn’t spin at all, but I’m still happy that I have a relay for power. It makes it much harder for it to turn on accidentally.
- The only unused outputs from the Grbl controller are spindle speed, spindle direction, and coolant. There are no unused inputs into Grbl at all. So, if I want to send a signal to the tool changer to unlock and eject a tool, then I need to do it via some combination of spindle speed, spindle direction, and coolant activiation signals.
- I didn’t want it to be possible to eject a tool while the spindle was running. The tool holders weight a pound or so; sending one spinning across the room like a 25,000 RPM top is a nightmare.
- Debugging all of this blind seems painful, so I decided that I wanted to add an LCD display so that I could see the current RPM and messages about tool change status.
- I wanted to be able to add a compressor and a vacuum, both controlled via the same power switch as the CNC, so I didn’t have to dig around under the table looking for power switches.
- I didn’t want a ton of power cords running from the wall into my control box. Ideally, a single connection would be best.
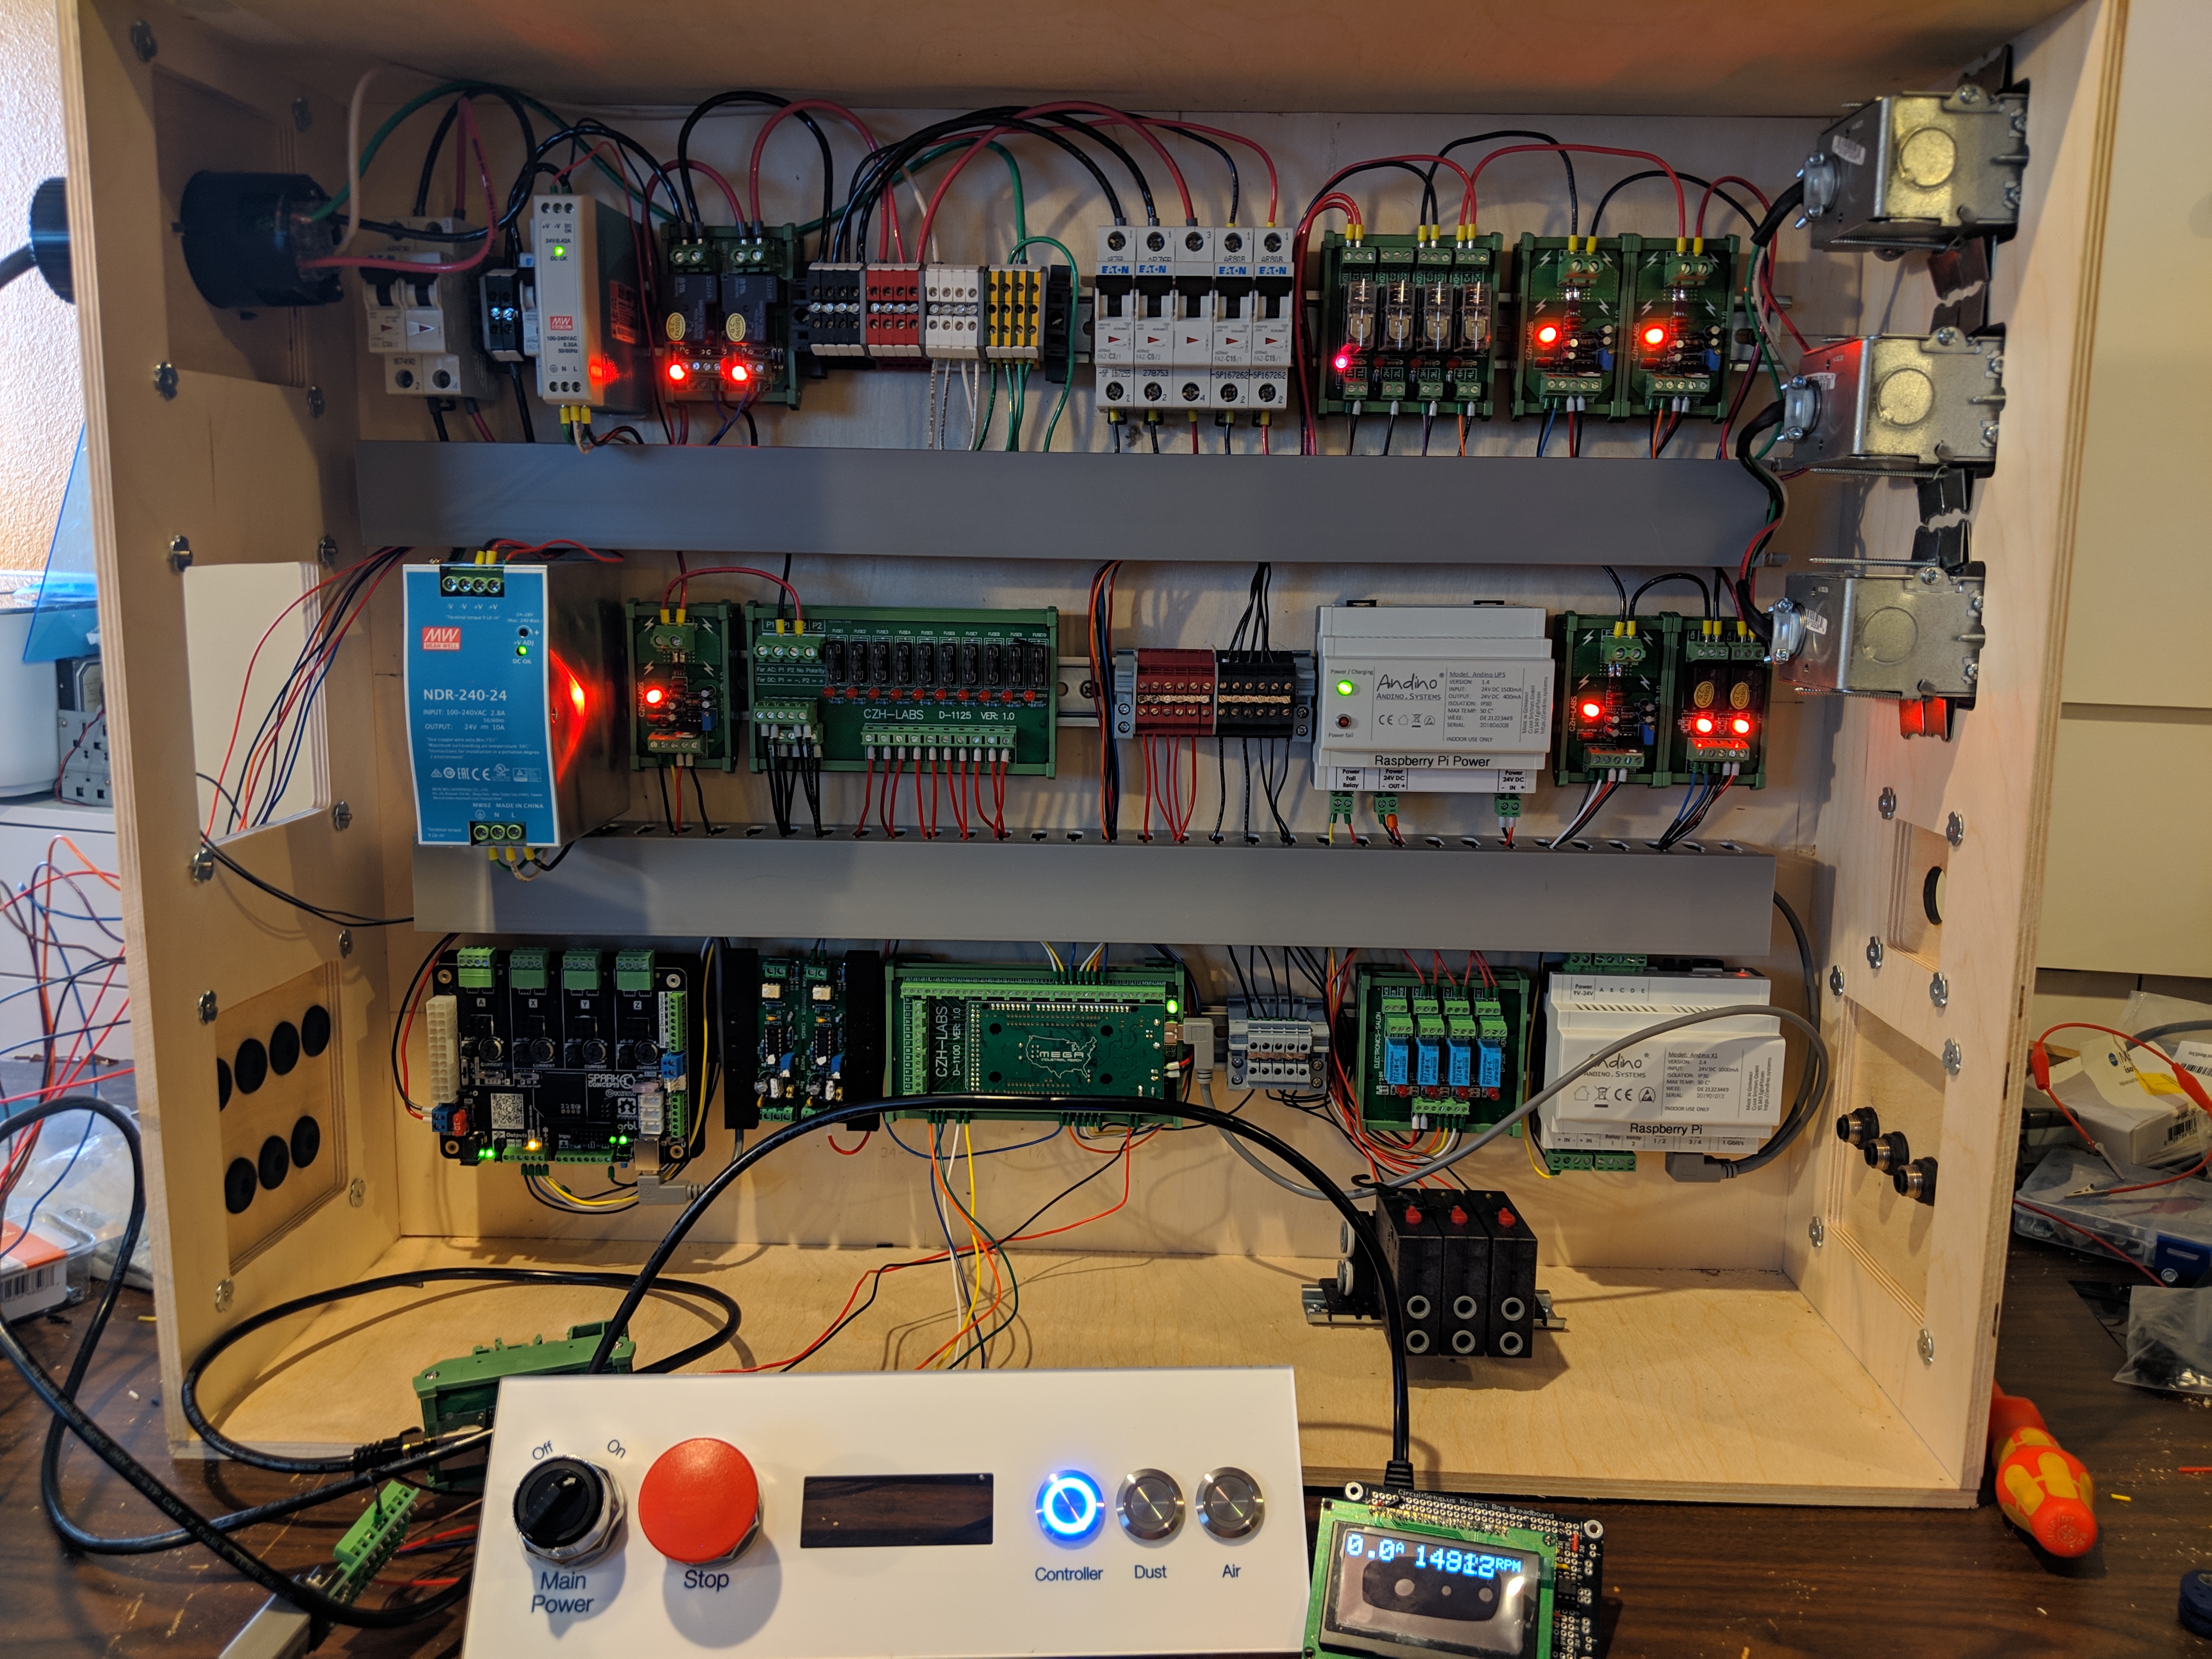
I needed to put together a bunch of electronics to let me drive the new spindle, change tools, and generally use the CNC safely. In general, I tried to optimize for debugability first, then reliability, with cost somewhere further down the list. I didn’t want to end up with something that needed constant debugging but was too frustrating to work on and fix.
I’d never built anything like this before; I don’t have a ton of electronics experience, but most of this isn’t electronics, exactly–it’s more of a matter of reading datasheets, thinking through the consequences of what they say, and then creatively solving problems. It’s closer to plumbing or system administration.
Fairly quickly I decided to try to mount everything that I possibly could on DIN rails and to connect all of the wires using screw terminals instead of PC-style click-on wire connectors. That meant that I spent more time running wires, but very little time building complicated wiring harnesses, and changing my mind generally just meant that I had to unscrew a single wire and reroute it.
After considering it briefly, I decided that I really didn’t want a short inside my electrical box starting a fire, especially since I have a number of line-voltage devices in there, so I added circuit breakers for everything. I also have fuses on most of the DC lines. Nearly everything inside runs on 24 VDC power.
Everything about this screams “you need a microcontroller with lots of I/O pins to tie everything together,” so I ended up with an Arduino Mega sitting in the middle of everything on a nifty screw-terminal DIN-mount bracket. The signals from Grbl go into it, and it talks to the relays and pneumatic solenoids that actually control all of the extra parts. I ended up buying a Rugged MEGA from Rugged Circuits rather than using a stock Mega, because it’s happy being powered by 24 VDC (everything on this board is powered by 24 VDC), and because it has a number of extra safety and reliability features that make it much harder for me to kill it by accident with a misplaced wire.
I ended up going a bit overboard with the electronics for this all and overflowed my Shapeoko-sized box. This isn’t as complicated as it looks, really, it’s mostly power routing and measurement.