4 minutes
Milling My CNC’s Base Plate
My CNC build is nearing completion. There are still a lot of things left on my to-do list, but they look a lot more like upgrades and improvements and less like requirements.
I’m almost done with the last big assembly project: milling an aluminum base plate for the CNC. I could just use MDF for mounting things to the CNC, but MDF isn’t nearly as solid as the rest of the machine. I decided to buy a 1/2" thick piece of aluminum plate that would cover the entire working surface of the CNC, and then mill mounting holes into it using the CNC itself.
I was originally just going to buy 6061 aluminum plate (“aircraft-grade aluminum” to marketing people, the default aluminum alloy to practically everyone else), but discovered that I could buy ATP5 tooling plate for not much more, and it was much flatter and designed for this sort of use. So I ordered a 1400x1000mm (oops–they only use feet and inches, make that 4’ 7-1/8" x 3’ 3-3/8") chunk from Midwest Steel. The shipping on a 103 lb chunk of aluminum was entertaining, but not outlandish, and it actually arrived before I was ready for it.
There were 4 things that I wanted to mill into the plate:
-
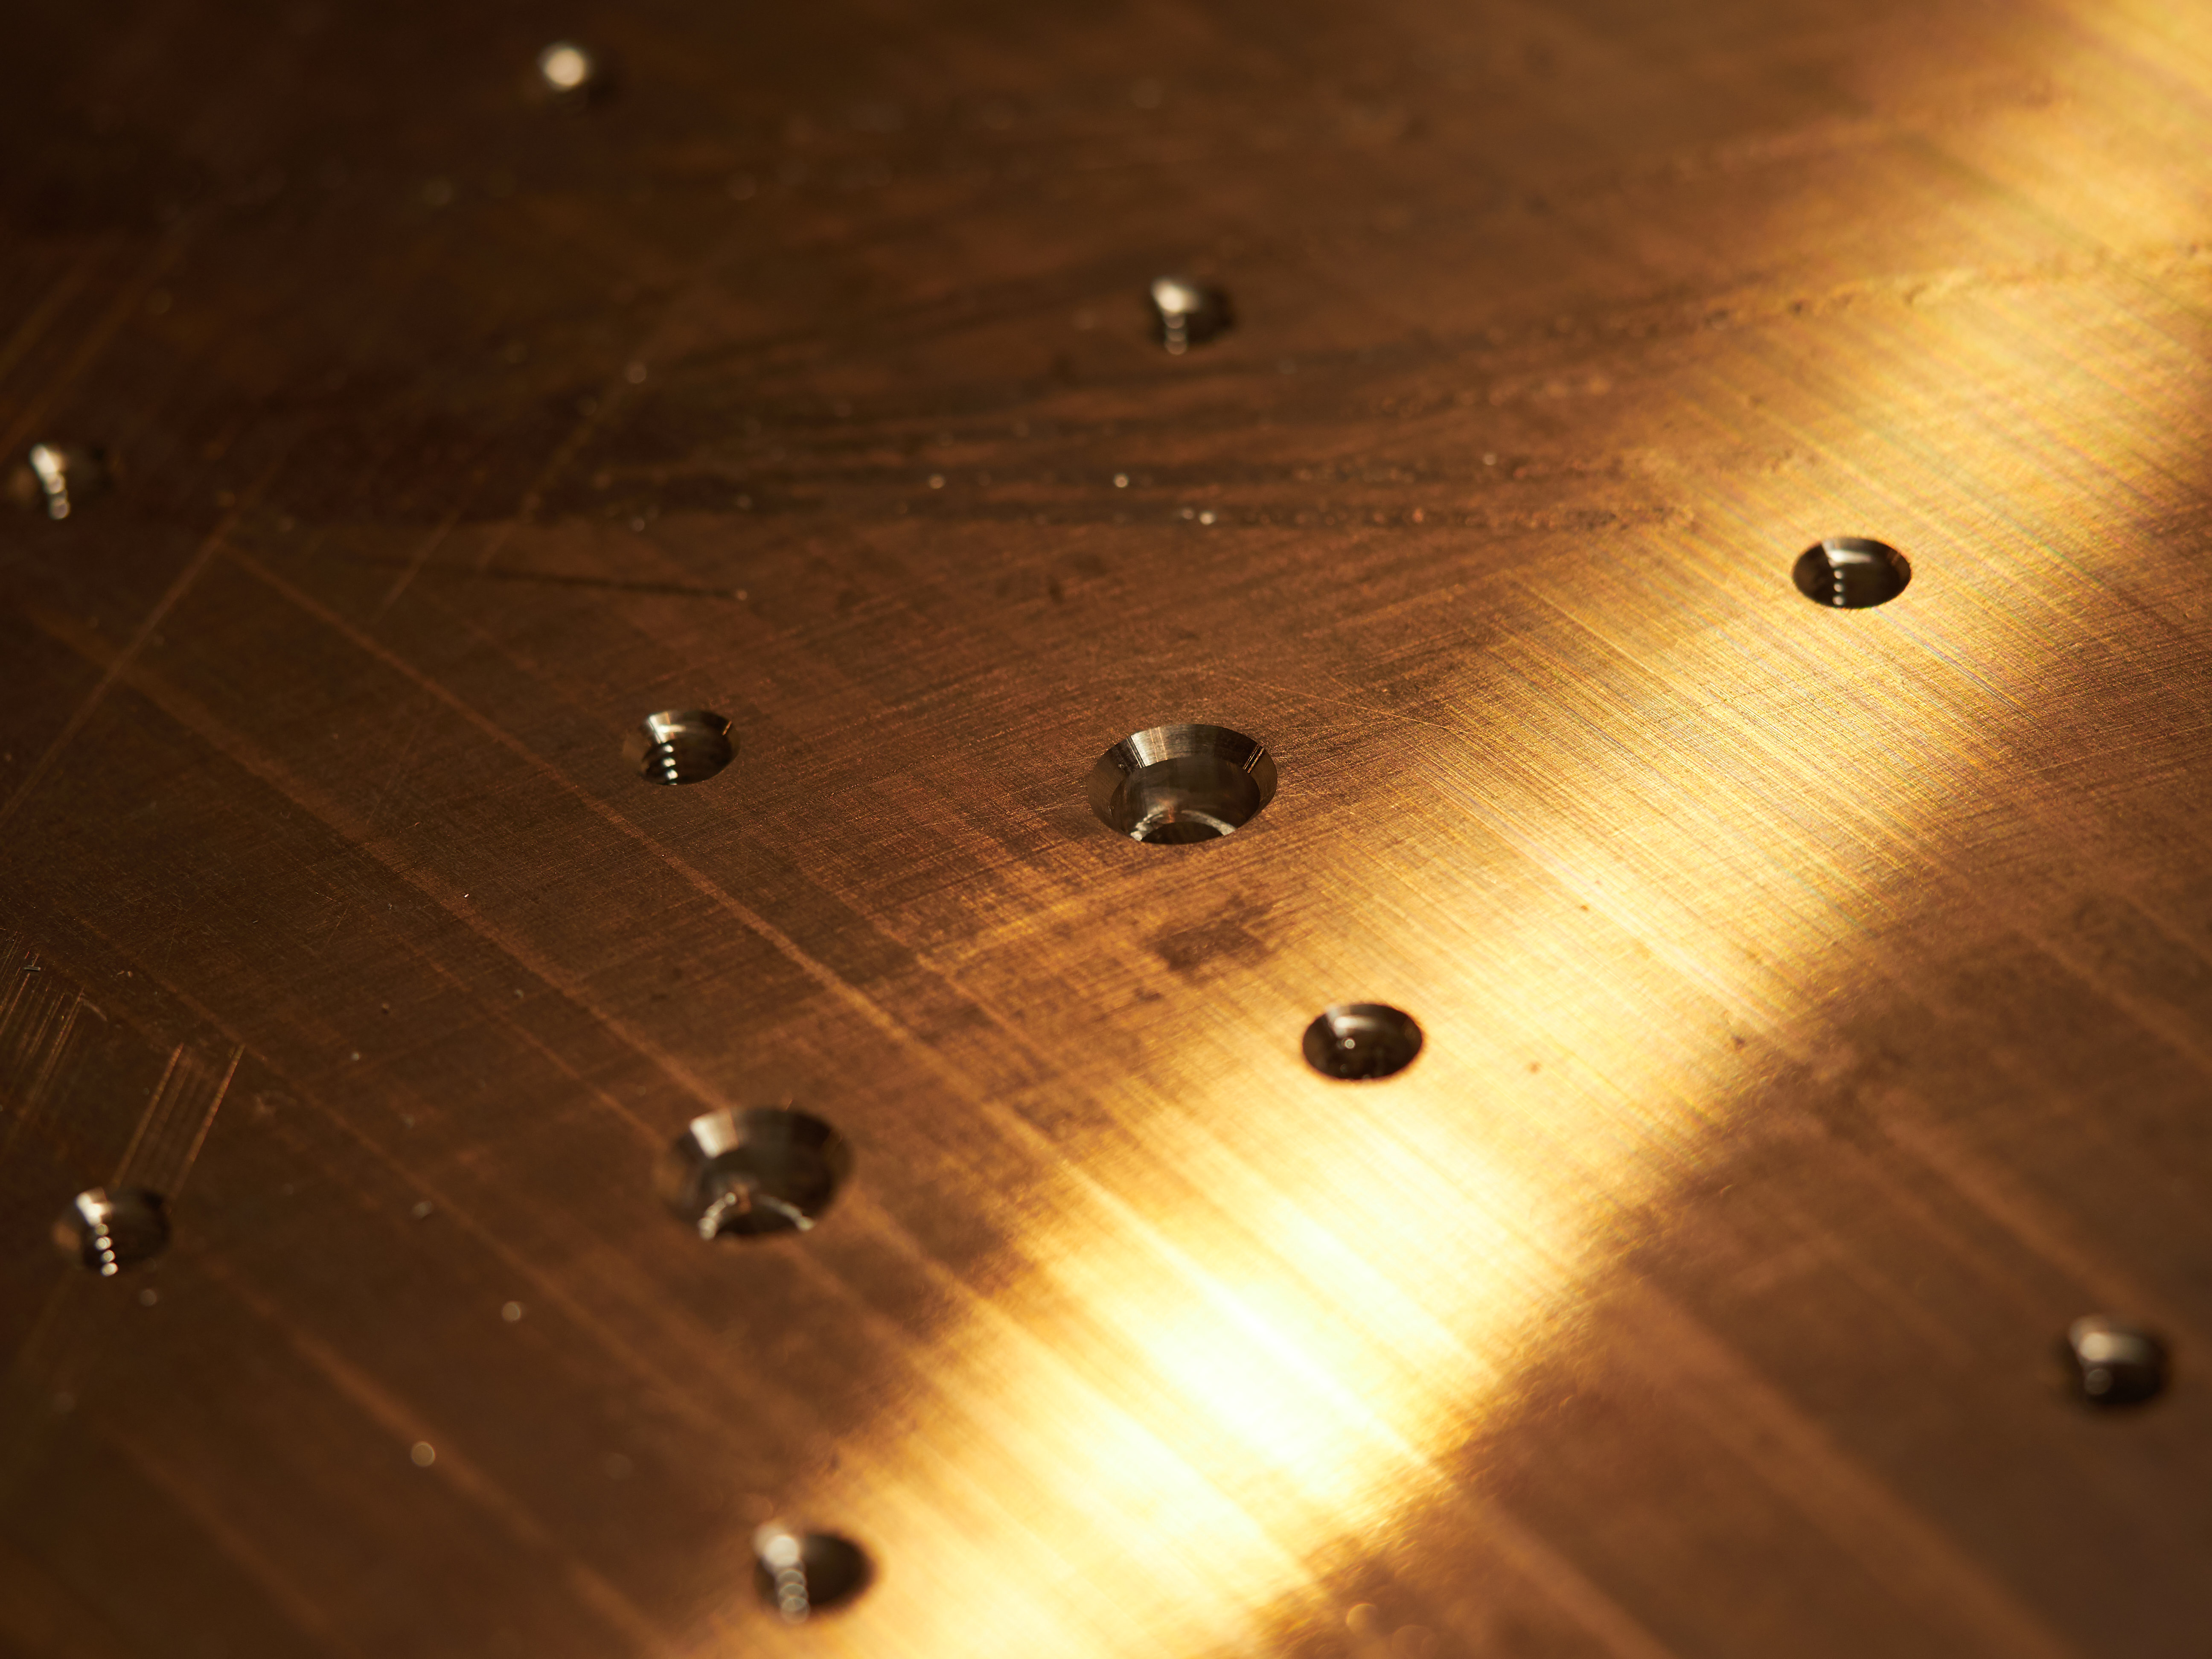
Mounting holes so I could use M5 screws to hold it down to the 20x80 v-slot extrusions that form the bottom of the CNC. I wanted enough screws that it would make the whole CNC more rigid, and so there wouldn’t be any long unbolted spans that could resonate and make noise. By the time I was done, I ended up with a total of 69 mounting screws.
-
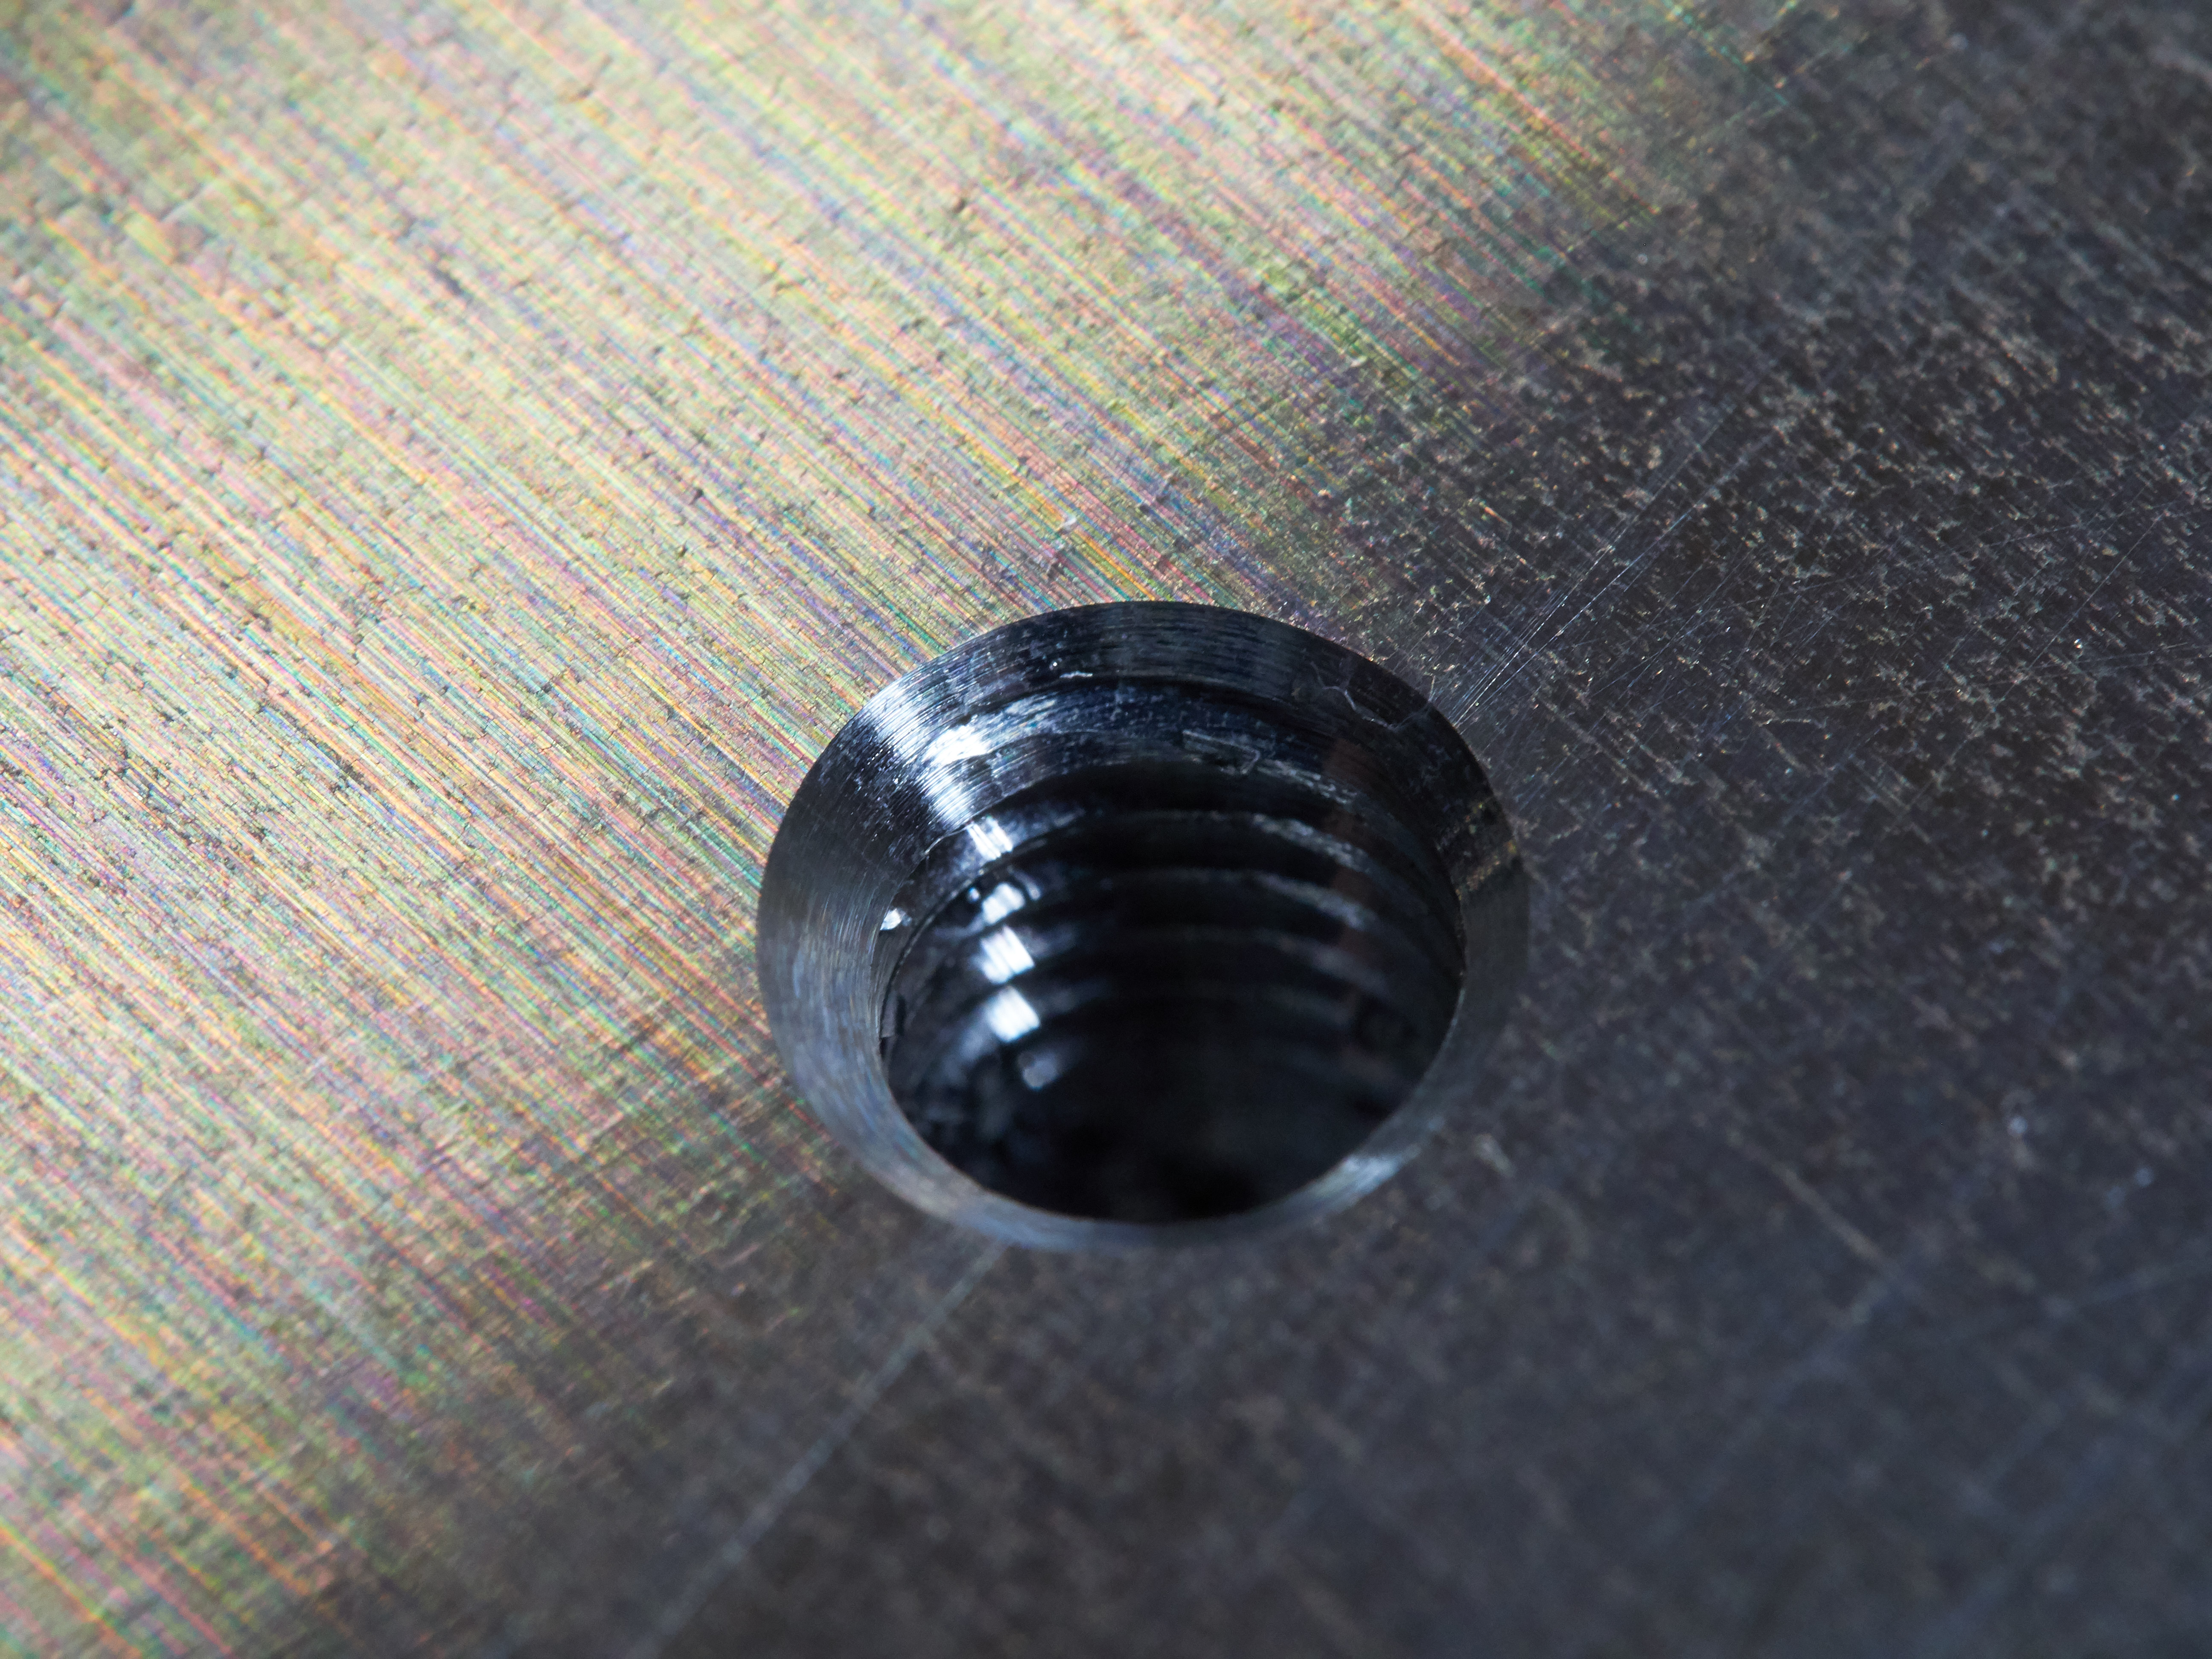
A rectangular grid of holes for mounting things to the base plate, tapped for M6 screws. After playing with the design in Fusion 360 a bit, I decided on a 50x50mm grid, totalling 416 holes. I kind of wish the grid had been tighter, but it was tough to keep the holes from running into the mounting holes from the previous step.
-
An additional grid of holes for mounting an MDF wasteboard to the Aluminum. When milling wood (most of the time), I’ll want to cover the aluminum up with a sacrificial piece of MDF. The MDF will have all 416 holes from the previous step drilled into it, plus an additional 50 mounting holes (on a 140x150mm grid) used to hold the MDF down to the aluminum.
-
A set of holes for bolting down milling vises. I have a cheap 6" vise and a couple cheap 4" vises that I want to be able to mount directly to the aluminum. For the 6" vise, this means M16 bolts 200mm apart. For the 4" vises, this means M12 screws 132mm apart.
The whole process came out much better than expected.
I recorded the whole thing via the Garmin Virb Ultra 30 that I mentioned a few days ago. It’s mounted directly to the spindle and powered by the CNC’s 24V power supply (via a DC-DC converter that drops it down to 12V). I’ve been pulling video off of it over WiFi, so I haven’t had to remove it from the CNC at all in order to use it. It’s just there, ready to go all the time.
Here’s a (poorly) edited version of the basic milling.
So, I’m not a videographer… sorry.
A few things I learned (or re-learned):
-
The aluminum plate is conductive. So is the frame. Setting the probe block directly on the plate leads to immediate probe failures, because the CNC controller can read continuity through the frame instead of through the tool like it’s supposed to. The easy fix is to put the probe on top of a piece of paper.
-
Fusion 360’s default CAM bore finishing settings are way too aggressive for aluminum-framed CNCs. It wanted to do a full-depth finishing pass cutting 0.635mm while using a 1/4" (6.35mm) endmill. That lead to a couple horribly non-round vise-mounting holes. I dropped it down to 0.2mm and it was still working a bit. 0.1mm (times 12.7mm deep) would have been better.
-
1/8" endmills and I still don’t get along. I broke another one. I think that’s #9 this year, and I did it similarly to the way I broke one of the earliest ones. When boring, don’t leave an island of aluminum in the middle, un-cut, or it’ll eventually find a way to bind your bit up and break it.
-
Fusion 360’s 2D chamfer CAM operation really needs a “select same diameter” or similar option. Clicking on 500 individual holes is insane.